GEX Gamma Heatmap
Gamma Exposure Heatmap for Traders
See dealer gamma exposure as a live GEX gamma heatmap on the chart — gamma flip, max pain, call wall, and put wall for BTC, ETH, gold, and SPX. Read pin vs trend regimes before you trade the break.
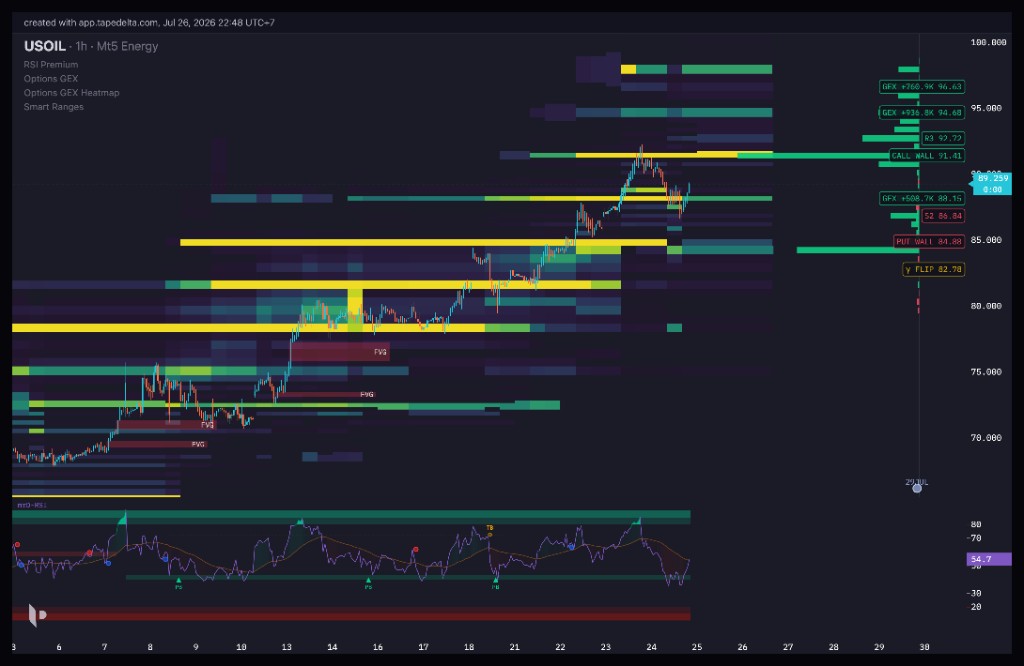
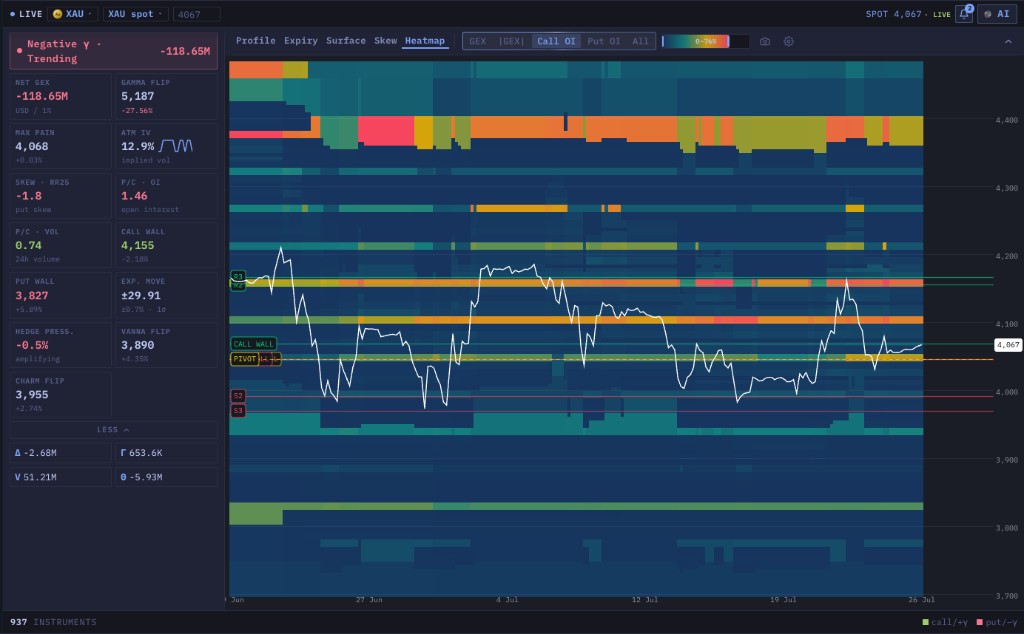
GEX gamma heatmap on price — call wall · put wall · γ flip · net GEX
What is a GEX Gamma Heatmap?
A GEX gamma heatmap (gamma exposure heatmap) visualizes how options dealers are positioned across strikes and time. Instead of a raw options chain, you get color bands behind candles: where gamma is heavy, where it flips sign, and which strikes act as call walls and put walls. Traders search for “GEX heatmap” and “gamma exposure heatmap” because this view answers one question: will dealers dampen the next move — or fuel it?
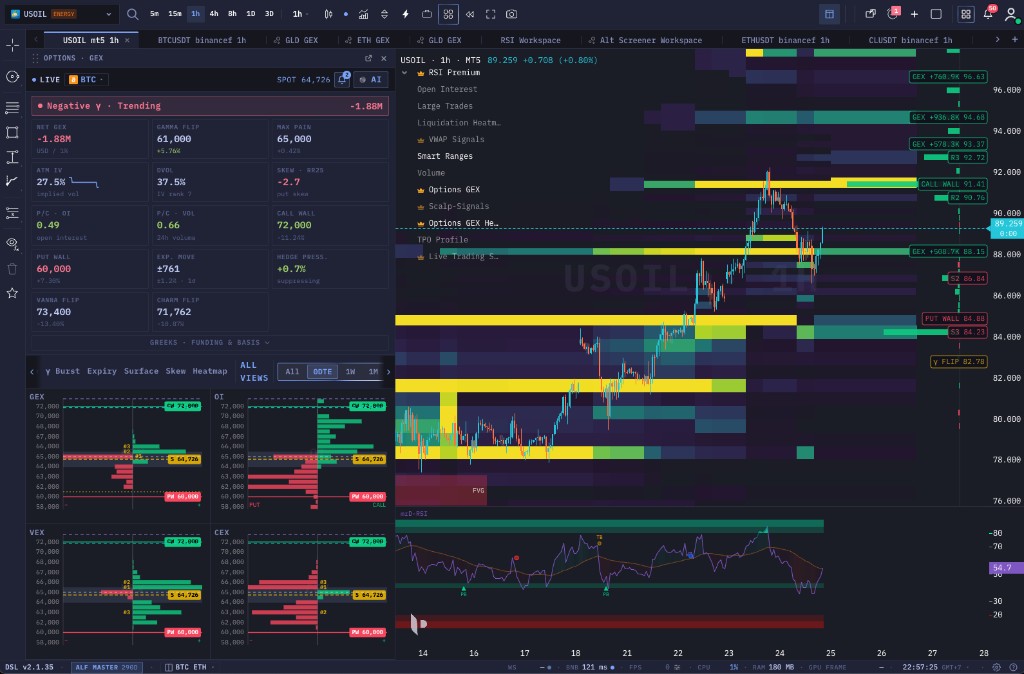
Tape Delta builds the GEX gamma heatmap into the chart terminal and a full Options GEX workspace: KPIs (net GEX, gamma flip, max pain, ATM IV), strike profiles (GEX / OI / VEX / CEX), a strike × DTE surface, and the heatmap overlay you trade against.
Why Trade with a GEX Gamma Heatmap?
GEX Gamma Heatmap Overlay
Dealer gamma painted as a live gamma exposure heatmap behind candles. Bright bands = heavy GEX; watch how clusters migrate as expiry and spot move.
Gamma Flip Level
Zero-gamma pivot on the chart and KPI panel. Above the flip dealers dampen moves; below it hedging amplifies trends — the core GEX regime switch.
Max Pain Magnet
Expiry strike where the most options die worthless. Into weekly and monthly rolls, max pain often pulls price — especially in positive-GEX regimes.
Call Wall & Put Wall
Largest positive and negative gamma strikes bracket the range. Call walls cap upside; put walls cushion downside while positioning holds.
GEX · OI · VEX · CEX Profiles
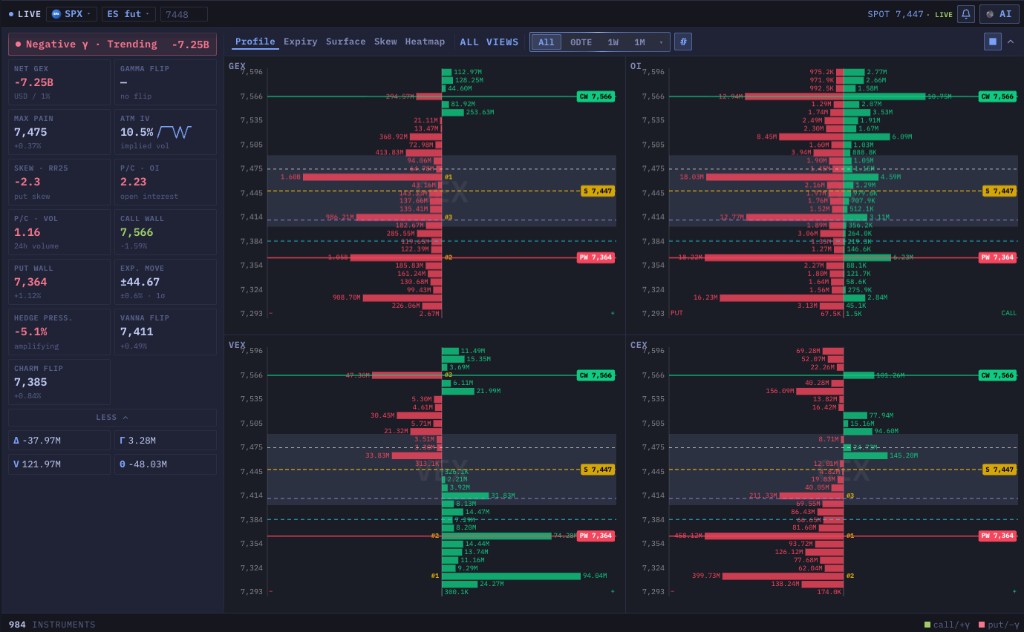
Strike profiles for net GEX, open interest, vega exposure, and charm — the same dealer-positioning stack desks use, next to your heatmap.
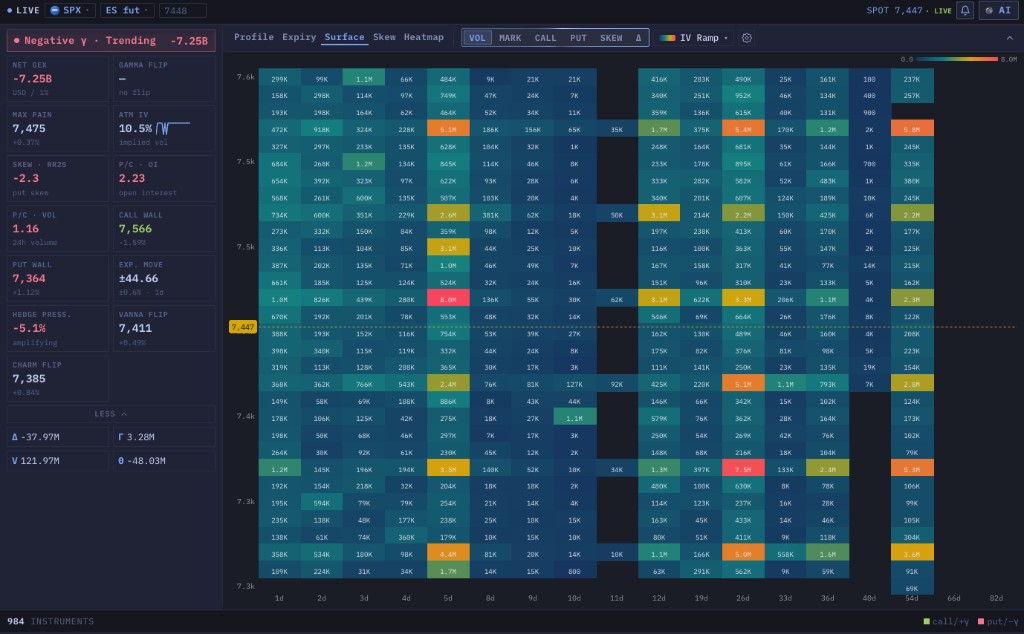
Strike × DTE Gamma Surface
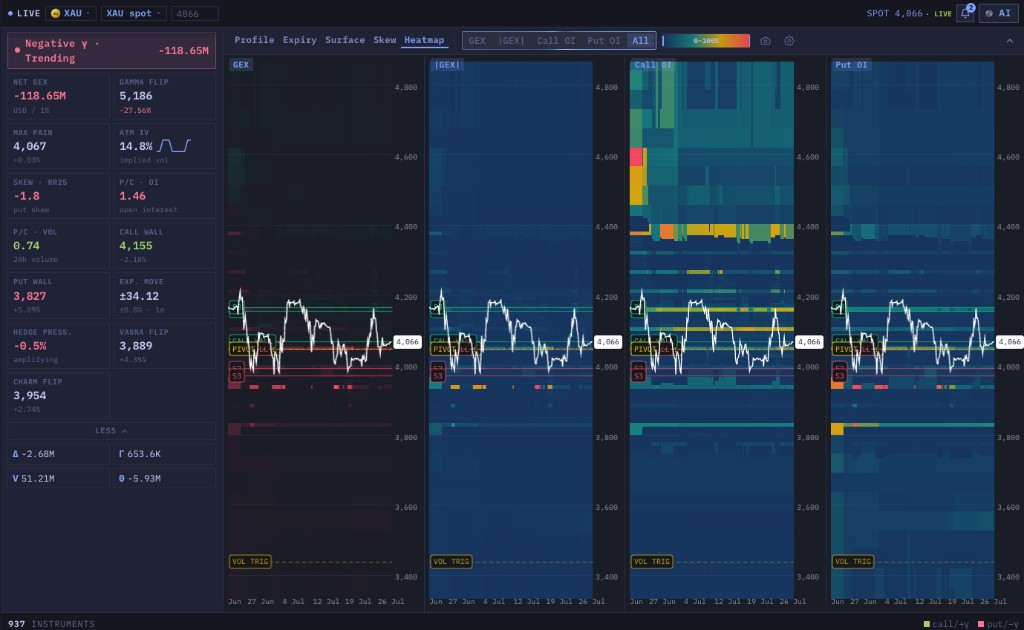
Heatmap cells by strike and days-to-expiry. Spot 0DTE piles, weekly walls, and where gamma rolls off before the print.
GEX Gamma Heatmap in the Terminal
Workspace heatmaps, strike profiles, and the gamma surface — more views beside the chart overlay.
Key Levels on Every GEX Heatmap
Gamma Flip
Price where net dealer γ flips sign — pin above, trend risk below.
Max Pain
Strike that maximizes worthless expiry for option buyers — magnet into roll.
Call Wall
Largest positive-γ / call OI cluster overhead — common resistance.
Put Wall
Largest put / negative-γ cluster below — common support floor.
Net GEX
Aggregate dealer gamma (USD / 1%). Positive = dampening; negative = amplifying.
Hedge Pressure
Whether dealer hedging is damping or amplifying the current move.
GEX Gamma Heatmap FAQ
What is a GEX gamma heatmap?
A GEX gamma heatmap (also called a gamma exposure heatmap) maps dealer options gamma across price and time as color bands behind the chart. Bright zones mark concentrated GEX. Combined with call wall, put wall, gamma flip, and max pain, you see where dealers are likely to dampen or amplify price.
What is GEX (gamma exposure)?
GEX measures how options dealers must hedge per unit move in the underlying. Positive GEX tends to pin and mean-revert; negative GEX tends to amplify trends and squeezes. Tape Delta surfaces net GEX live next to the heatmap.
How do I read a gamma exposure heatmap?
Track the bright bands (heavy gamma), the gamma flip (regime pivot), max pain (expiry magnet), and the call/put walls (range brackets). In positive GEX, fade edges into walls; in negative GEX, respect breakouts as hedging can fuel the move.
Which markets have a GEX gamma heatmap?
BTC, ETH, gold (XAU), and major US index products such as SPX / US500 — with matching KPI tiles (net GEX, ATM IV, skew, expected move) in the Options GEX workspace.
Is the GEX gamma heatmap free?
No. The GEX gamma heatmap, chart indicator, side widget, and full workspace require the Pro plan for every pair, including BTC.
Open the GEX Gamma Heatmap
Pro plan unlocks the full gamma exposure heatmap — chart overlay, widget, and workspace — for BTC, ETH, gold, SPX, and more.
Upgrade to ProGEX Heatmap Explained · Gamma Exposure Guide · Orderbook Heatmap